
Create materials part 2 - layers
In particular, this article explains the procedure if you want to back plate materials that you have coated yourself. In this example blockboard with walnut veneer.
The upper part of material mask is to be treated in the same way as in the first material description.
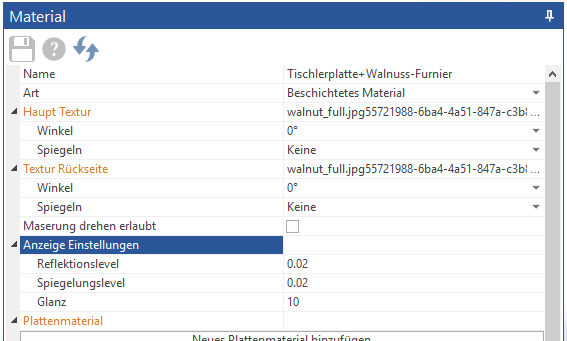
It gets interesting now when creating plate material.
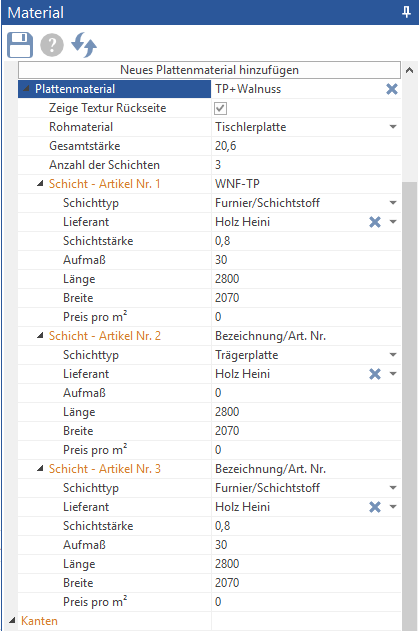
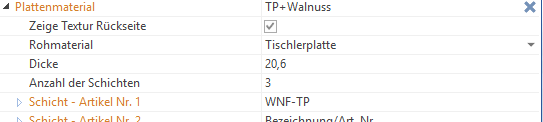
Under raw material determine what corresponds to the core of your record.
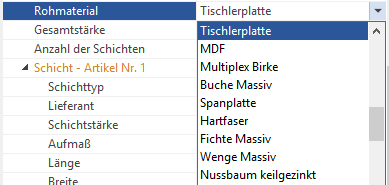
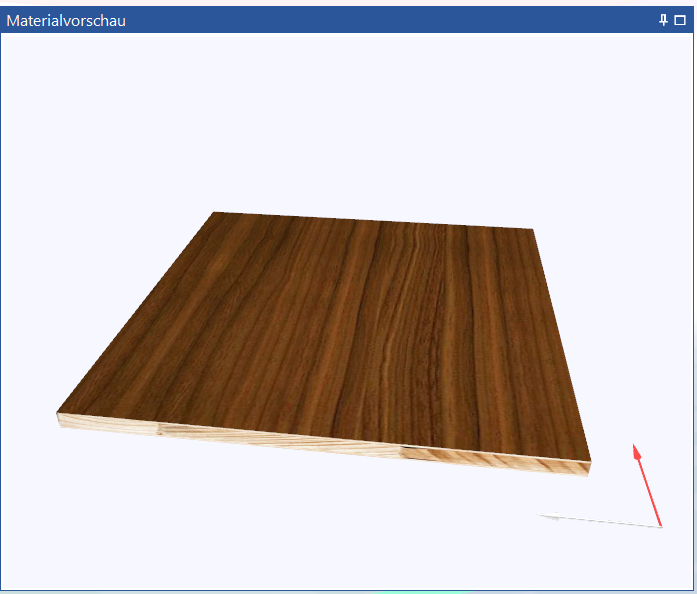
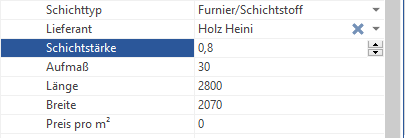
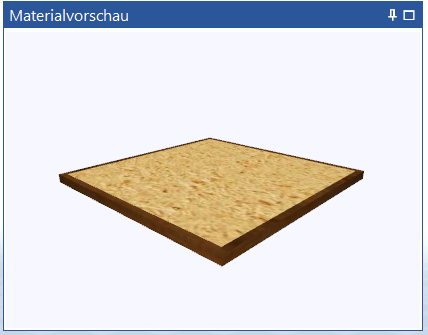
In this example it is blockboard. The material preview changes according to your selection.
The overall strength comes as the next point. The thickness of the carrier board and the layer thicknesses must be entered here.
For our example, this means Blockboard 19 mm + 2 x veneer 0.8 mm = 20.6 mm - This must be taken into account during construction. Accordingly, the elements that are drawn in must also be 20.6 mm thick.
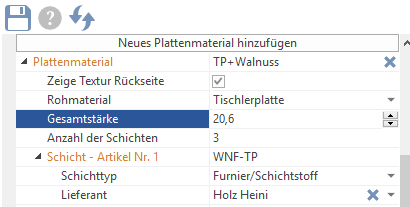
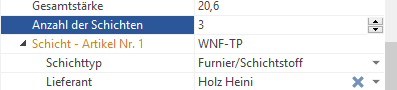
Next, set the number of layers. (The maximum number of layers is 15)
Once your number has been set, the shifts will appear below the number field. Open the settings by clicking the arrows in front of the layers.
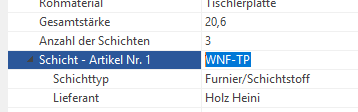
You should enter a name or an article number here.

Next, determine which one shift type is desired.
Next, a supplier entered or selected.
The layer thickness is, as explained above, one of the important parameters. In this example our veneer is 0.8 mm.
If you adjust the veneer thickness but not the overall thickness, SmartWOP will automatically resize the core board to match the overall thickness.
It is very important that the layers are added together with the carrier material. If we had not done this in our example, 2 x 0.8 mm would have been subtracted from the 19 mm blockboard and would have given us the unrealistic value of 17.4 mm for the blockboard thickness.
Under allowance determines whether and how far your shift lasts. length and width refer to the dimensions in which the laminate is “raw” in your home.
The Price per m² is currently only output when exporting via an interface. It can therefore also be left blank.
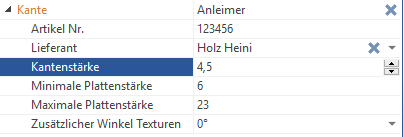
In the Edges sub-item, click on “Add new edge material” an edge can be assigned to the material.
A 4.5 mm thick edge band for boards between 6 and 23 mm was created here, which is now also available in the material preview is shown.
