FAQ - Frequently Asked Questions
How to design a carcass with mitre joints?
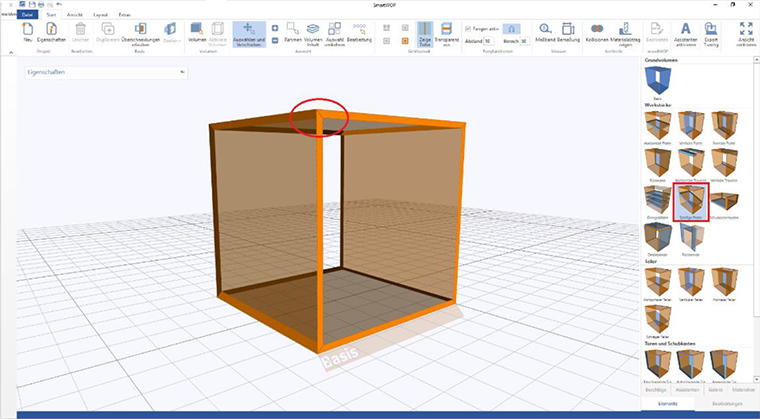
In SmartWOP you can only have mitre joints on Frontal and Diagonal Panels. How to design a carcass using those panels?
Select a Diagonal Panel instead of a horizontal Panel, but arrange it horizontally. Click on that panel and tick Left Mitre and/or Right Mitre.

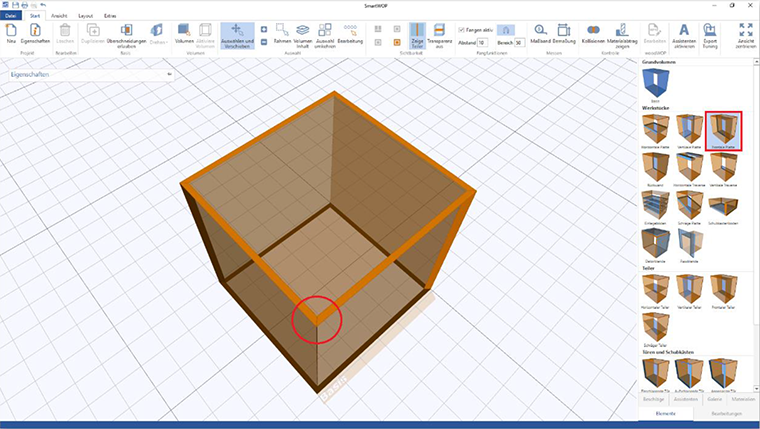
In the construction, the carcass edges are mitred. No further adjustment of the vertical plates is required.
The miter for the front panels is adjusted in the same way:
click on the frontal plate and set the tick miter left and miter right.
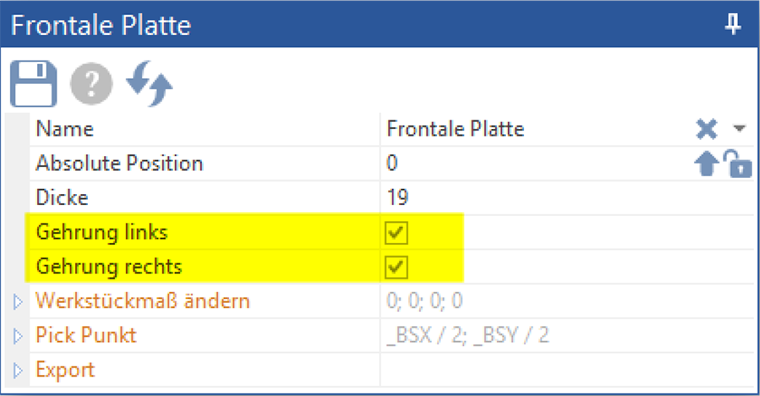
In the construction, the carcass edges are mitred.
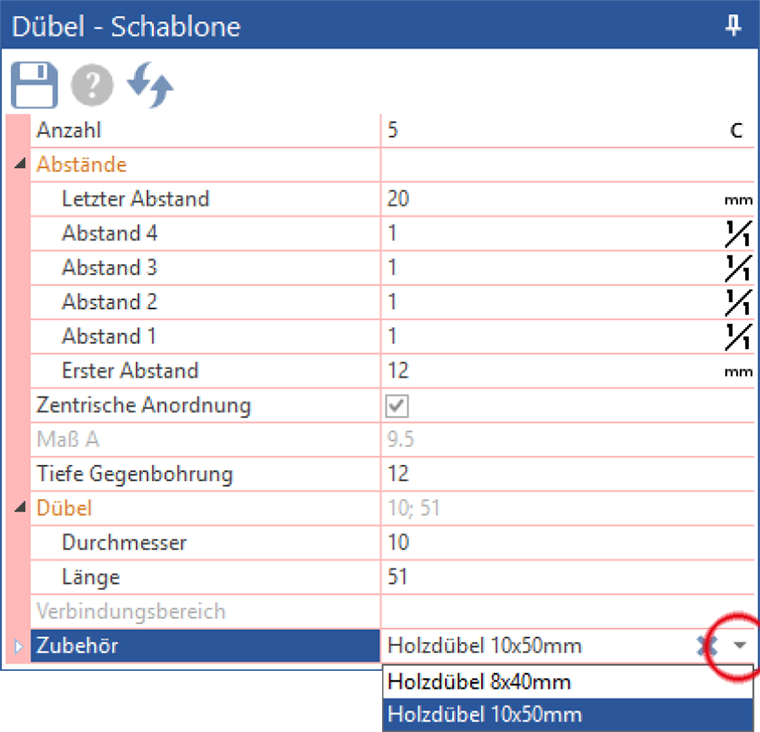
How to use an overlay door as a rigid panel with dowels?
How to use an overlay door as a rigid panel with dowels?
First create your construction without a door. Editing with dowel must be done before the door is brought in.
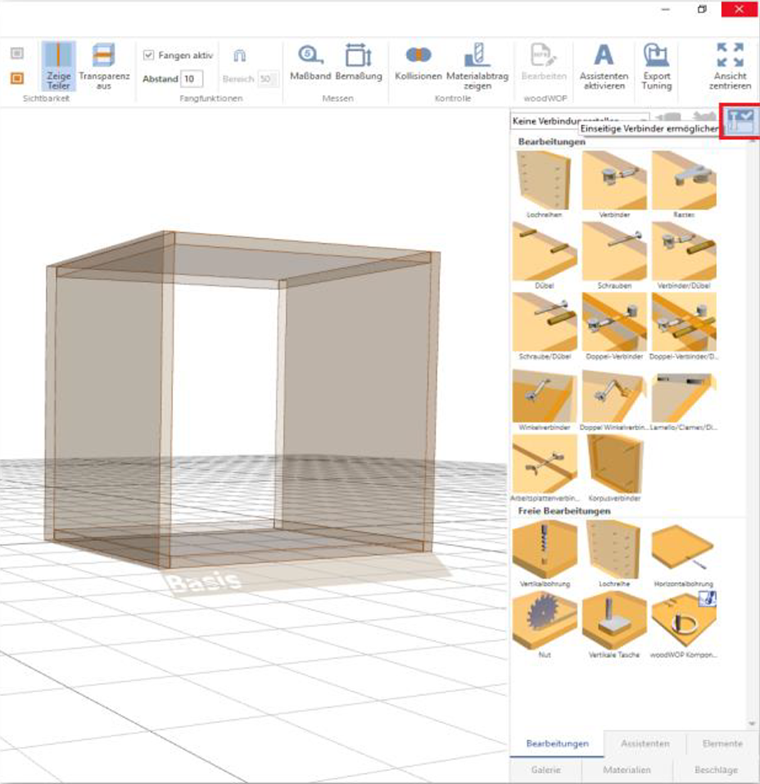
Activate edit mode Allow one-sided connectorsby clicking on the highlighted button.
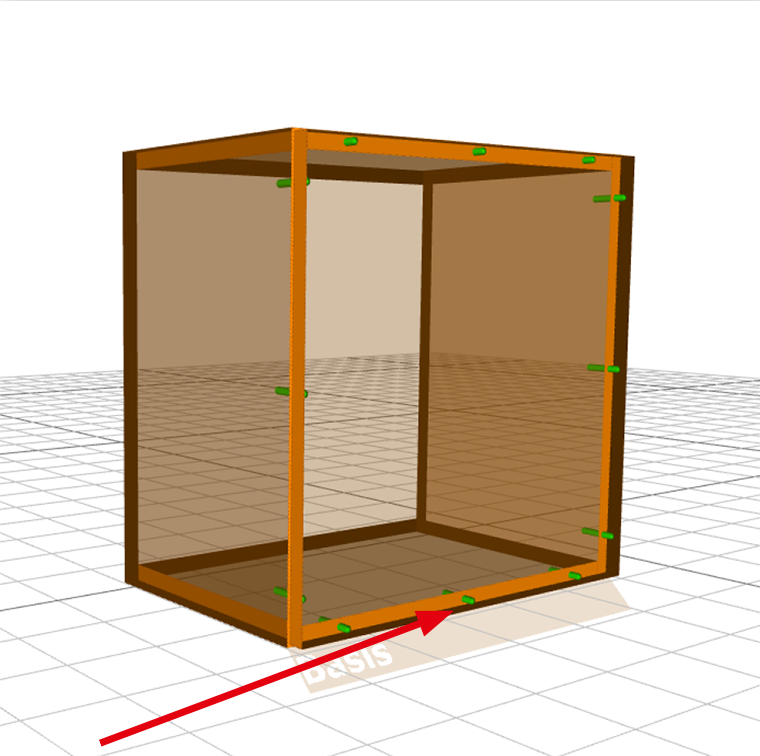
Drag the dowels to the desired cabinet edge. Adjust them if necessary.
Then draw a door over the construction. The dowel holes are automatically assigned to the door.
How to use hinges to create hatches from doors?
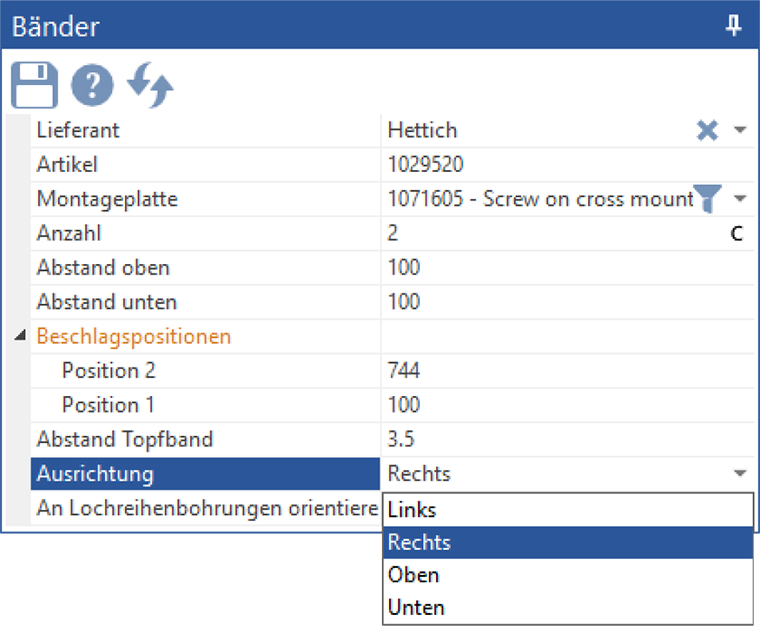
Choose a pot band from the hardware library. Pull the desired cup hinge into the construction.
The sub-point alignment will be activated and you can click on the alignment Left, Right, Up or Below set.
Please notice that alignment only becomes active in the construction and cannot be saved in the template.
Back panels, rebated or grooved?
Open the template of back panel, by selecting "Rear Panel" in the menu elements choose.
Click on export. In the sub processing type you can select the desired type (grooving saw, grooving cutter or woodWOP component).
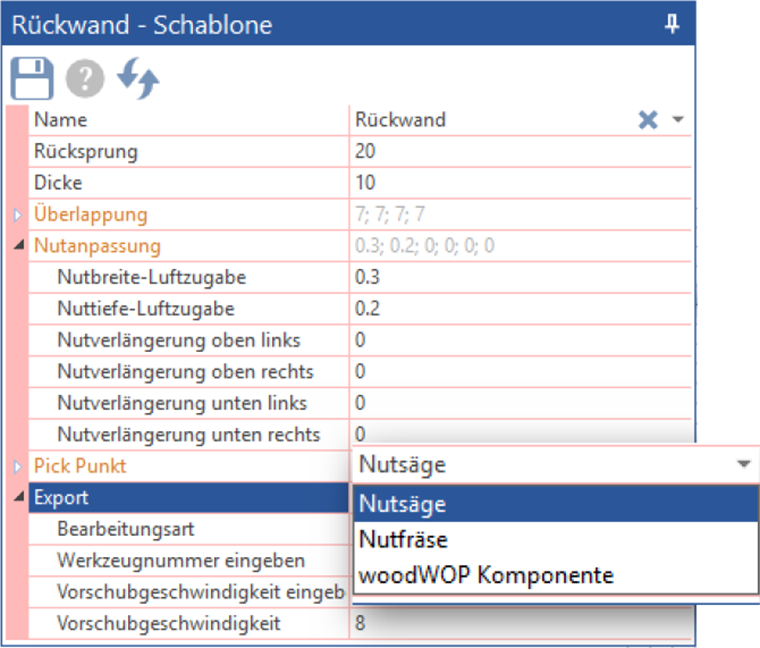
Groove saw options:
Put a tick next to it Enter feed rateto manually set the feed rate. If not, the value stored in the woodWOP tool database is adopted.
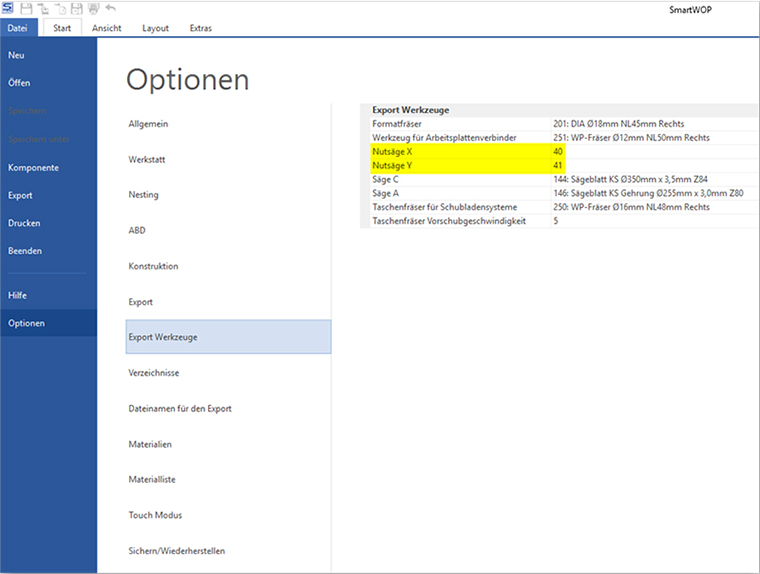
Put a tick next to Enter tool numberto at File-> Options-> Export Tools use stored tools, otherwise the standard tool stored in the woodWOP tool database will be used.
How to add different fittings & connectors to your templates?
Click on the element for which a new profile is to be created. Make the appropriate changes in the template.
Type in subheading Accesories Enter a name under which this template should be saved.
Then press Enter on the keyboard.
Click that floppy disk iconto save the changes as a new template with the name you entered.

Both profiles are now available to you and can be selected from the drop-down menu under Accesories to be chosen.
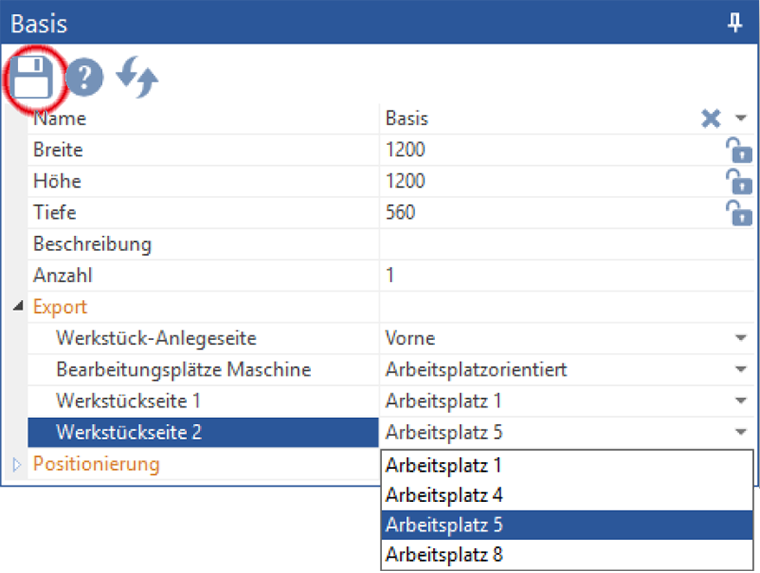
How to assign a specific workplace for the CNC machine?
Click on base volume. In the basic volume template, under the point export find the sub Machining stations machine.
Choose the option you want: Front back or Workplace Oriented.
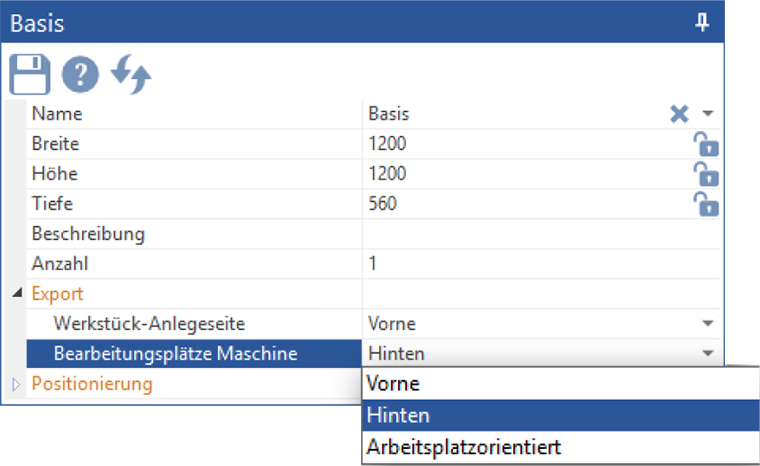
The assignment of a preferred workplace for each side of the workpiece takes place under selection Workplace Oriented. Choose from 4 possible jobs here.